
Ok I have been talking about this quilt long enough, it's time to start. The book I am using is, "Judy Martin's Log Cabin Quilt Book".
You can see it here: http://www.judymartin.com/products.cfm?page=2&action=detail&prod=37&CatID=1
Scroll down to the bottom of the page and you will see a twin size of the quilt. I will be making a twin size for now.
NOTE: I have been working on this quilt for two weeks now off and on but I am just posting the make up of it.
Did I mention that Log Cabin Quilts are my favorite? I love scraps so it stands to reason that I would love this quilt. Every quilt in this book is to die for. Judy did a good job on this book of logs.
This would be a great quilt to make for the Christmas season. If you use a red theme like Judy's. I see a lot of red, it makes the quilt warm. It would also look great in blues or greens for a cool look. There is a handsome Green River quilt in the book also. You can colorize this quilt or just make it with light and dark values, which is what I am going to do for now, things may change.
I always do a couple blocks of a quilt to familiarize myself with the blocks. I cut a few strips and made this block last night.

I can see already, that I need to pull some strips out of the light side. I will make another block and see how that looks to me. The block ended up more that 9.5, so I will have to check to see what I need to adjust...
I will be posting as I go along making the blocks and putting it together. If anyone would like to make this quilt along with me, now is the time. You can ask question etc. I will be working on this quilt until it is finished, so stay tuned.
Once I do a block I will go ahead and do the number of those same blocks that I need, so It might be a while before I post another different block but in the meantime you can ask question or make a block and see how you do. This is an awesome quilt and so worth the effort.
I have a tv on my cutting cabinet. I have Netflix streaming movies into it lol and I have a bunch of Perry Mason in my instant list. I put one on and started to cut the dark strips some days ago.
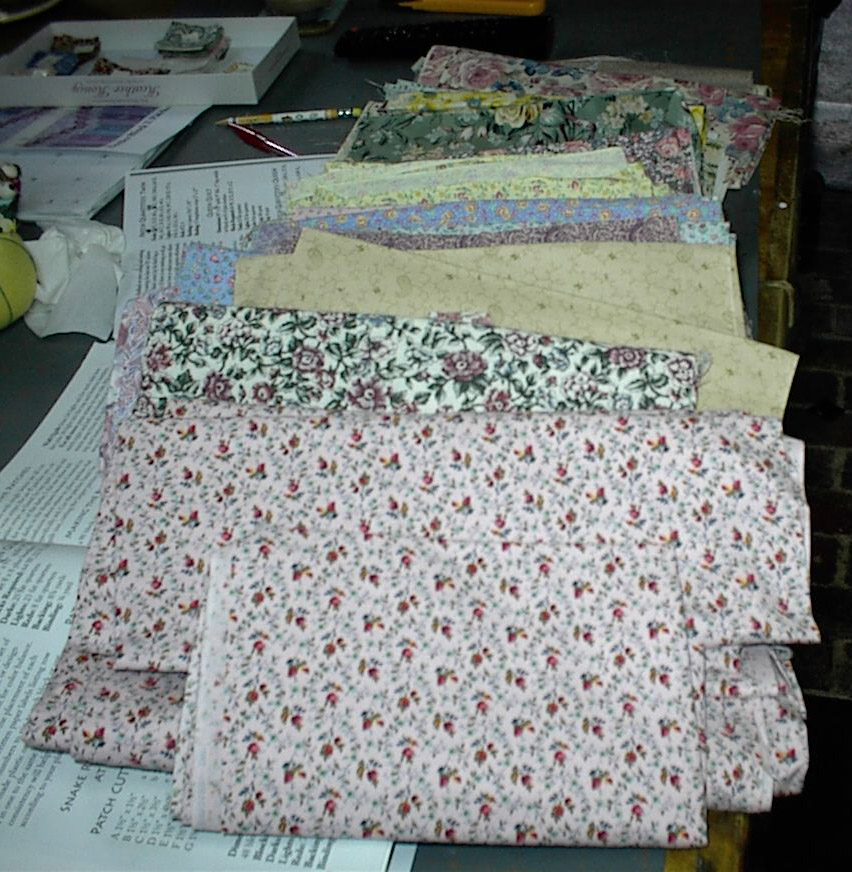
I cut strips from 13 different fabrics so far. I don't have a color theme just light and dark and color doesn't matter. I will pay attention however, as to where the strips will be placed to each other and that is fun for me.
I have a few more dark fabric to cut as I like lots of different fabric in a scrap quilt. I have a head start on the lights but need to cut lots more.
I have a nice little square container that sheets came in and my darks fit nicely in it. I have labled the strips with the letters, as per the book.

Another thing I have done to make my life easy lol, is to copy and enlarge Judy's diagrams. She has two diagrams for each block, one is lettered and one is numbered for the position and size. I use the lettered diagram and put the numbers from the corresponding diagram on the strips. Now I just have one diagram to look at and it's larger and easy for me to see

I also copy the instruction sheets as sometimes I write notes, so I keep my book like new and the sheets are easier to handle.
I take my time when cutting the strips as they must be accurate to make this quilt successfull and I will check the strips here and there as I sew to make sure they are coming out right. It is better to catch any mistakes in the beginning.
I will make one block at a time for at least four blocks and check them for accuracy, by that time I will be very familiar with the blocks and then I will do some speed piecing.
I am never in a hurry when quilting so the cutting will take about three days as I will only cut for a couple hours at a time but remember, I will cutting lots and lots of strips. Once I am done, it will be easy street as the sewing is easy for me.
Here is a pic little rose fairy watching lol.

I pulled out some more lights. I can't believe my stash ahahahahah. I am only cutting for block W, at the moment so I get a break from all the cutting at once.
The rose bud in the front is the one that I will use next to the red cornerstones on every block, so that in itself will create an effect. I needed two yards for those and I had enough of that fabric....just what I wanted.
Ok, here is the second block and the one I am going to go by. The first one is now in the scrap basket lol.
Some of the strips require that you join several pieces before you add that strip to the rest of the block.
The way I am doing it, so as not to get confused....I have numbered and lettered the graph and then made a row of numbers on the same sheet from 1-16 , that is the number of rows required for one block. I check off the row numbers as I do them.
I would finger press the strip and then when I joined the entire row strip, I would press with the dry iron.
I lay the entire block out before sewing it together. The advantage of laying out the block is that you can choose to remove a strip before sewing it. It does look different when seen side by side with all the other strips and to me, it's easy to just pick up the next set and go.
I still have the graph to look at and the chart with the size etc.
I pinned the finished block to my blocking pad and pinned it in place and spray starched and pressed with a up and down motion. The block came out a perfect 9.5 and that means that my sewing and cutting are ok.
It is going well. As you can see, I don't hurry as I enjoy the whole sewing process and I dont' care if it takes a long time. The end result will be the time you spend on it.
BTW, notice that I use the same rosebud fabric right after the red log. I think it will look real pretty in the finished quilt. I also wanted a distinct light seperation....
Also, I was careful that the lights and darks had a good contrast when I picked the fabrics. Like I said, I wasn't concerned with color, just contrast and lots of texture. I love texture.

I have been sewing for a few days but I am just posting my progress to the blog. I finished 7 blocks so far on that particular day and I love the way the pink bud is looking in the blocks. It takes six blocks for one row.

I finished two rows and starting on a third, it's going quite well now, as I am speed piecing now lol.

Row number 3 and I am loving it more and more. I know it's a lot of sewing but if approached it with the attitude that one is making an heirloom, one doesn't mind at all.
I am enjoying every minute of this quilt as I love the way it is showing. It has a certain overall glaze of sheer color that really doesn't show in this pic...it's amazing what happens with color....This is not a good pic. I will take a pic outside when it's all quilted and done and then we will see the overall effect in the daylight.
When I look at it here in person, I see a pink glow and it's so pretty.

I thought I might just write this info as I go along.
When I am going to do a lot of sewing, I like to use my Brother Quilt Club 1300 or my old Singer. They both have speed. The plus on the brother is that it has a sissor, a 1/4 foot and a 1/4 inch marking. It also is only for straight sewing with a one hole needle plate, which is what you want to use for straight sewing, as the stitches are more perfect and no grabbing of the fabric into the feed-dog like a zig -zag plate might do. I can start at the very beginning and not worry about the fabric being eaten.
I am writing this as I am sewing in case it might be useful for a beginner.
When I am sewing the strips, I back tack at the beginning and at the end, it's quick on this machine and more secure for my patches. I back tack everything. When I come to the end of the stip, I back tack but don't come forward yet to finish it, instead I put the other strip next to it and as I finish sewing the forward of the previous backtack strip, the new strip is getting pulled in and sewed.
When I cut the strips, I cut the longest one first, then the rest and so one. This way I have sizes of each strip to pick and choose from and there is very little waste. I cut from a set of four strips at one time.
Row six and just two more to go and then it's on to the inner borders. There was never any boredom or tired of working on it feelings. Everyday, I wanted to work on it and I think the key is knowing when to quit.
I would do six block and then the first six strips of the next set of six blocks, and then quit, so the next day I only have 10 strips to go and they go fast as I have all my strips organized. I am watching Sherlock Holmes now and I don't even know where the time goes.
I take breaks to do small things here and there, go outside with the dogs and sit a spell and watch all the lovely greenery and the sky and then I am refreshed again for the next stint of sewing.
I am still sewing it's 12.22 pm and I'm not tired. I thought I would share some my take-outs of quilting. In a quilt like this one, I don't cut all the strips or all the patches. I would find it overwhelming and loose interest if I were to look at a huge stack of patches that I had to sew up.
I realized my limits a long time ago. I had a few UFO's and I don't like that lol. I realized that it was so much better to cut a little and sew a little. In this quilt for instance, to give you an idea. I cut enough for four rows of 24 blocks more or less. I don't know at the time, that that is the amount that I cut.I just stop at a certain point when I feel the limit lol.
I always make between one to four blocks to see if I like the look or to get the feel for the quilt and I am so glad I do that. It is better to catch whatever you don't like right at the beginning.
After I am familiar with the block construction, I start to speed piece. I only speed piece 6 blocks at a time, my limit. I can't bear to do more than six at a time. I find it very satisfying to finish six blocks, press and block them and put them on the board. When I see progress, I get more excited to go finish some more blocks. Six blocks finish a row in the middle of this quilt.
Now when I start doing the border blocks, I am sure I will either divide them up into six and two or do the whole row. It depends how I feel about it at the time.
Sometime it pays to know your limit, so you don't feel overwhelmed.

Here are all the blocks sewed together.I sewed the blocks and rows together last night, I just couldn't wait. I love the way this quilt turned out. I can actually see ripples of water, it's playing tricks with my eyes lol. I imagine the dark is the snake and the light is the river, imagination is funny lol.
I have errands to do today so I won't get back to sewing on the border until later this afternoon. So far I have sewed together 2,304 pieces. It seems like a lot but it doesn't feel that way. 48 blocks and 48 piece in each block.
Remember I said I have a limit of how much I cut at one time? It turned out that I had actually cut enough of the darks and still have some left over, who knew? I just had to cut very little more of the lights. The reds and the rose bud, I had to keep cutting as I ran out, there are a lot of those lol.
The border is going to be a piece of cake. I will do the inner border today for sure. It's just squares of light.
It was easy to put the blocks and rows together. Thank goodness for the board. I took down two blocks sewed them together and opened them up. I did two more and kept adding to the row. Then I put the row back on the board and did the other row. I then sewed those two rows together and put them back on the board, so that made two rows sewed together.
I continued this way and then sewed the sets of two rows together and so on. I made sure to look at my chart to make sure I had them turned the right way. I did that every time I handled a row and there were no mistakes, thank goodness.....ok off to do errands
Now I will work on the inner border. The inner border consist of squares of all the light fabrics, sewed together for each side.

Inner border is now attached. I am taking a break today and will work on the outer border tomorrow.
NOTE: What I have learned from this quilt. If you look at the quilt you can see where the rows join. I missed this little ditty. I should have choosen the same dark at the end of each block so they would meld into each other and no visible line would be seen, but never mind is all good until next time. You learn something new with everything.


No comments:
Post a Comment