Monday, April 30, 2018


Monday, September 12, 2016
Time for another post lol.


Hassock/Tuffet
I have seen these Tuffets all over the web and decided to do my Hassock for a start. Here is what I have done so far.


1..Measure across the top of hassock or tuffet or whatever.
divided that measurement in half and that is your radius.
2..measure from the edge of the hassock to the bottom and
add about 4 ins. for turning under.
3..measure around the hassock for the for the circumference,
and divide that measurement by 8, This will be the measurement of your wedge.
.add 3/4 ins on each side for the seams.
Add your radius #1 plus #2 and cut a piece of square paper
that measurement plus a little over for safety.
The width of the paper will be the measurement you got from
the wedge plus the 1 and 1/2 ins for the seams. ..so if your wedge is 10 ins,
you will add 1 and 1/2 for a total of 11 1/2 ins for your wedge.
Fold the paper in half to get the center line. Put a dot at
the beginning of that line at the top. Now measure from the top of the paper to
the radius number and place a mark. Draw a line across the paper square from
edge to edge. Draw ¾ seam allowance along both edges of the paper square.
Divide the rest of your paper square into 8 strips, not
including the seam allowances. The strips don’t have to be equal. Start at the
center seam. On each side of the seam draw a half ins line, that will make that
strip 1 ins. Then draw lines on each side of this center strip. Only draw the
lines up to the radius line.
After all these line are drawn, the proceed to line up those
bottom line with the rest of the pattern. For instance..place ruler at the line
and angle your ruler to the dot at the top of the paper square and continue
with each line this way. Then cut the excess paper and you have your wedge. Lay
this on your item to check it out and make adjustments to whatever you want.
When you are happy with it, make a freezer paper pattern from you original
paper pattern but this time draw the lines with a sharpie pen.
You will iron that freezer pattern to your muslin and cut it
out, draw the lines on the muslin, just like your paper. You are now ready to
add your strips. When you start to sew the strips on and you come to the radius
point, just try to sew it like a curve.
Monday, September 21, 2015
Rag Puppy Quilt
Hello, I'm back with a fun article.
I just finished this Rag Puppy quilt. Here he is with his ears down and then pinned back so you can see his whole face. I made him entirely of flannel and used as many prints as I could. He measures 60 inches long by 50 inches from paw to paw. His exact measurements are....chest 31, hips 33, he has no waist what-so-ever lol.
He was a lot of fun to make and some kid will hug up with him by the end of this month. He is so cuddly that I am loathe to let him go. His nose and eyes are sewed on by machine, I don't applique. Then I used some Decoart SoSoft Fabric paint to add the highlights to the eyes, I used an Identi-pen to go over the smile lines. .
I washed him and dried him to make him rag up. The more you wash him the more his edges will rag up. If you turn him over, he has different fabric behind also. I might paint a cat face on that side.
This is a Simplicity pattern that is out of print now.


I just finished this Rag Puppy quilt. Here he is with his ears down and then pinned back so you can see his whole face. I made him entirely of flannel and used as many prints as I could. He measures 60 inches long by 50 inches from paw to paw. His exact measurements are....chest 31, hips 33, he has no waist what-so-ever lol.
He was a lot of fun to make and some kid will hug up with him by the end of this month. He is so cuddly that I am loathe to let him go. His nose and eyes are sewed on by machine, I don't applique. Then I used some Decoart SoSoft Fabric paint to add the highlights to the eyes, I used an Identi-pen to go over the smile lines. .
I washed him and dried him to make him rag up. The more you wash him the more his edges will rag up. If you turn him over, he has different fabric behind also. I might paint a cat face on that side.
This is a Simplicity pattern that is out of print now.


Tuesday, July 14, 2015
Renewing the Blog
I am coming back to my blog. I will be posting most of my stuff here. I know it will take time for my friends to come back and that's ok. Facebook is fine but the blog was always a good thing. I will be back tomorrow with new stuff....food, knitting, quilts etc...
Thursday, January 22, 2015
AFRICAN FLOWER CROCHET BULLDOG


Hello Bloggers, it’s been a while since I posted on here, so
I thought I would return now and then for those of you who don’t do Facebook
lol.
This is Max, a beautiful, colorful, African Flower Bulldog. He
is crochet using the African Flower Motif, not a granny square. He is made
with, hexagons, pentagons, triangles, octagons, squares, and the seven petal
one…..
I know he looks complicated but he is very doable. The instructions
and illustrations are excellent. Anyone who crochets can do this. The designer
for this pattern is, Heidi’s Bears.
I will show you several areas of his body so you can see how
he comes together. He is bigger than the pattern because I don’t listen very
well lol.
He is supposed to be made with fingering yarn and a 1.75
crochet hook but I had all this needle point yarn and had to use a larger
needle, so there you have it.
I love him! I love his large size, he make a statement and
sure shows of all my lovely colors.
Wednesday, June 25, 2014
The Angel of Death


 First I dip my brush into the varnish and apply the color. I do this for every brush load. Here you see the bottom half of her after the dark has been added and then some color.

Here is the front at stage one and here is the back.
 Next I will glaze on some tints with Decoart American glazing medium and the Traditions Paint with is a pure pigment. http://www.traditionsartistacrylic.com/
To be continued....
Painting the
Angle of Death
Ok, I see I haven't blogged forever since last year November. Well, you all don't comment so I think you don't care, hahahhaha
Anyhow here is something new. I told my neighbor, who was moving, to just
throw this grey angel in my yard if she decided to not take her. She promptly did so after
her children told her they were scared of it lol.
I sealed the Angel and base coated her with any color, doesn't matter as it will change. I just wanted to get some paint in her and cover the grey.
I will be painting the Angel using,
DecoAmericana bottled paints, in many colors and I will tell you how I am doing her. I have a big tub of water
out, a tub of Extender, and a tub of varnish, a 2 inch brush for extender and
water and a 1 inch for painting, so far go good.
I have pulled out many colors
of reds, purple, blues, yellows greens, whites.
I will show
pics as I go along with it for your enjoyment. I will also tell you how I am
doing it, so you can grab a yard piece and do your thing too. I love lots of
colors as all my painting friends know and lots of color is going to go on this
piece
.
I am going
to give the front of the Angel a coat of Extender and make sure it doesn’t
puddle, I just wipe my hand over it and adjust here and there, I will include
the front of the wings too. Any paint that falls on her foot, wings, face, will
stay right there. I will just blend it in with the brush. This is going to be
Artistic License and so fun for me. I love to paint this way.
I have her
on my cutting table (as I am not sewing for a while). I actually have three
painting stations. One in front, one in the back and one on the side. Excessive?
That’s the America way, I love it lol.
This is the
scene. It’s great to have everything I need at hand. I have one of those huge
wet palettes and I will squeeze copious amounts of paint out, the darks first
and apply those and then start with colors
Here is the front at stage one and here is the back.
To be continued....
Friday, November 1, 2013
Large Chalk Owl
Some time ago, I made an
exchange. A cloth doll for an old beat up Owl from the 50ties. It is made out
of chalk or some substance like it.
Even tho he was so pitiful, I loved him at first sight. He is huge! I decided he had potential. He had traveled all over the USA, New York was his last stay. He had been knocked around quite a bit. I fixed the very large hole under his wing, rebuilt his feathers on that same wing. Patched all his bruises and cracks and formed him some new ears
Even tho he was so pitiful, I loved him at first sight. He is huge! I decided he had potential. He had traveled all over the USA, New York was his last stay. He had been knocked around quite a bit. I fixed the very large hole under his wing, rebuilt his feathers on that same wing. Patched all his bruises and cracks and formed him some new ears


I then sealed him up with that Decoart
Americana, Multi- Purpose Sealer and started to give him a new set of clothes and
bright eyes.
And then there was this pitiful little yard dog with his bone that I got from the neighbor’s garage sale, had to have him too. I rebuilt his tail and patched his cracks. He will get the same treatment as the Owl but his bone will be polka dots
And then there was this pitiful little yard dog with his bone that I got from the neighbor’s garage sale, had to have him too. I rebuilt his tail and patched his cracks. He will get the same treatment as the Owl but his bone will be polka dots
I did a coat of
Multi-Surface Sealer (Decoart) on the Owl, he looks so shinny now and his eyes
got all clear. I then mixed the Sealer and some dark Primer and did the dog.
Doesn't he look so sad? He is a dirty grey and black now lol.

I covered his breast with a coat of Extender, wiped it down and ladled the Burnt Umber that I had mixed with extender on him. Wiped him down and wiped out the high lights. I decided to then add some black under the feathers, which I also did to the eyes to make them recede.
Wiped that down and then added white to high light.


For those who have some statuary lying around and need fixing and painting. I used plummers putty for the fixing up and then I used the Decoart Traditions paint and Mediums. I couldn’t have gotten the effect I got with any other paint as these went on like oils and blended together without any lines etc. I had fun doing this
Thursday, October 24, 2013
Pumpkin Floor Mats

I just
finished painting six green pumpkin floor mats and they have been delivered
already. The mats are vinyl samples and just perfect for this. I did all my
base coats using the Decoart Americana line of bottled acrylics. The pumpkins
got a couple coats of any yellow. Then I switched to the Decoart Traditions
line to finish the pumpkins. I was aiming for simple and bright. I love that
paint, it just does what you want it to do.
You can get the paint here. http://tiny.cc/ci4g5w
You can visit the Decoart website and watch videos and get information about all their products. If you can't find the paint or products in the store you can order directly from them.

For the
leaves, I cut out some shapes in that compressed foam, called miracle sponges and flung it in water to
plump up and then did the touch and press leaves. I just put some greens and
yellow in a veggie tray and pressed the form all over it and then pressed on
the mat. I got several pressings out of one dip as you don’t want them all to
be the same.
These sponges are great, I have used them for years, you can get them here.
I did some
line work, let them cure overnight and applied three coat of varnish


Sunday, October 6, 2013
Painting Gourds, The Red Gourd
The Red Gourd is finished.

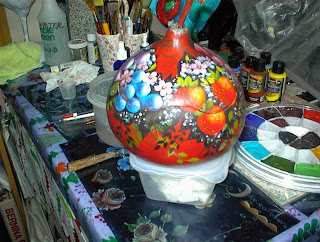


It's the same procedure as the previous Gourd. The only difference is the back leaves underneath and the black pull out out leaves.


It's the same procedure as the previous Gourd. The only difference is the back leaves underneath and the black pull out out leaves.
Wednesday, October 2, 2013
Painting Gourds, The Red Gourd
To continue with The Painting Gourd Series, here is the Red Gourd. Supplies used are the DecoAmericana Paint line and the DecoArt Traditons line.
I sketched on some strawberries and some grapes so far and based them in with the DA line of acrylics. I then switched over to the Traditions line.
The grapes are blue, pink, green and purple. These are going to be painted on a bed of black leaves.

Here you see the fruit with a coat of white to make the colors bright.

Here is the first shading and highlight. I think this Gourd will have a lot of tiny flowers added to it, those are fun to do.

I sketched on some strawberries and some grapes so far and based them in with the DA line of acrylics. I then switched over to the Traditions line.
The grapes are blue, pink, green and purple. These are going to be painted on a bed of black leaves.

Here you see the fruit with a coat of white to make the colors bright.

Here is the first shading and highlight. I think this Gourd will have a lot of tiny flowers added to it, those are fun to do.

Monday, September 30, 2013
Painting Gourds, Third Stage
Stage 3: The
Pears and were coated with extender and
then shaded with Red Violet and highlighted with Hansa Yellow Lt. More White
added and highlighted a second time. The same for the Cherries and
Strawberries. Plums and grapes were shaded with Red Violet and highlighted with
Aquamarine and more white.
Leaves: I
used two greens. Pine Green and Yellow Green Lt and white. I used my round
brush for the leaves. I did some curly cues with the #2 liner brush and
stippled some fru fru here and there (load the brush with some green, dip in
white and stipple here and there).
I dried the
Gourd with the hair dryer and put a coat of glazing medium all over it (dilute
the medium with a little water.) When dry, I will added some final highlights and
tints here and there. Remember, each highlight gets smaller and smaller,
leaving the previous highlights showing.
This is the results of all the above.


The fruit is nice and bright. The last stage is the antiquing. First I sealed the Gourd with the Multi Surface Sealer and let that dry overnight. Next, I mixed some Burnt Umber, added just a little Red Violet and black. The color should be mainly a reddish brown. .
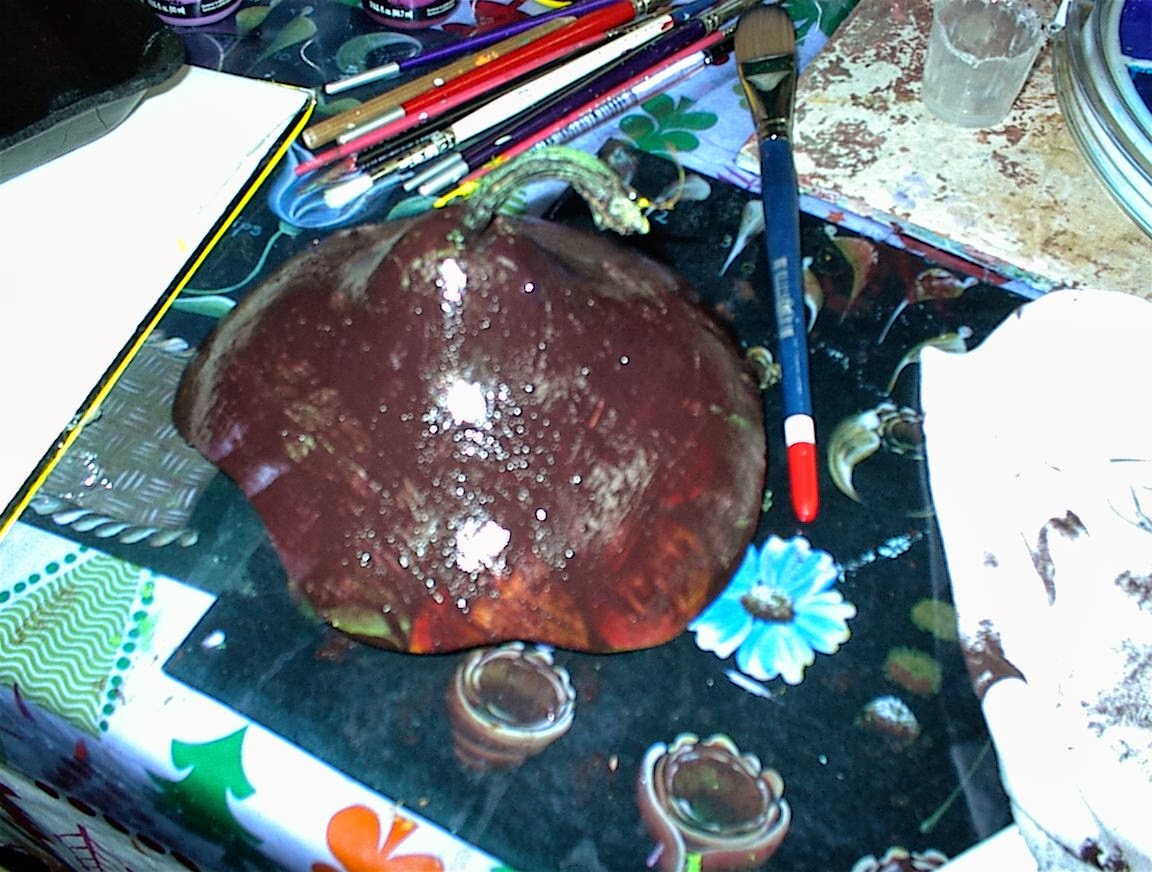
I coated the Gourd with Extender, wiped it down with a cotton cloth and brushed the antiquing color all over the top, then it was wiped down, making sure to change the cloth around to a clean spot. Then the highlights were wiped out. On the bottom of the Gourd, I antiqued it in sections. Below you can see how the fruit has a mellow look now.
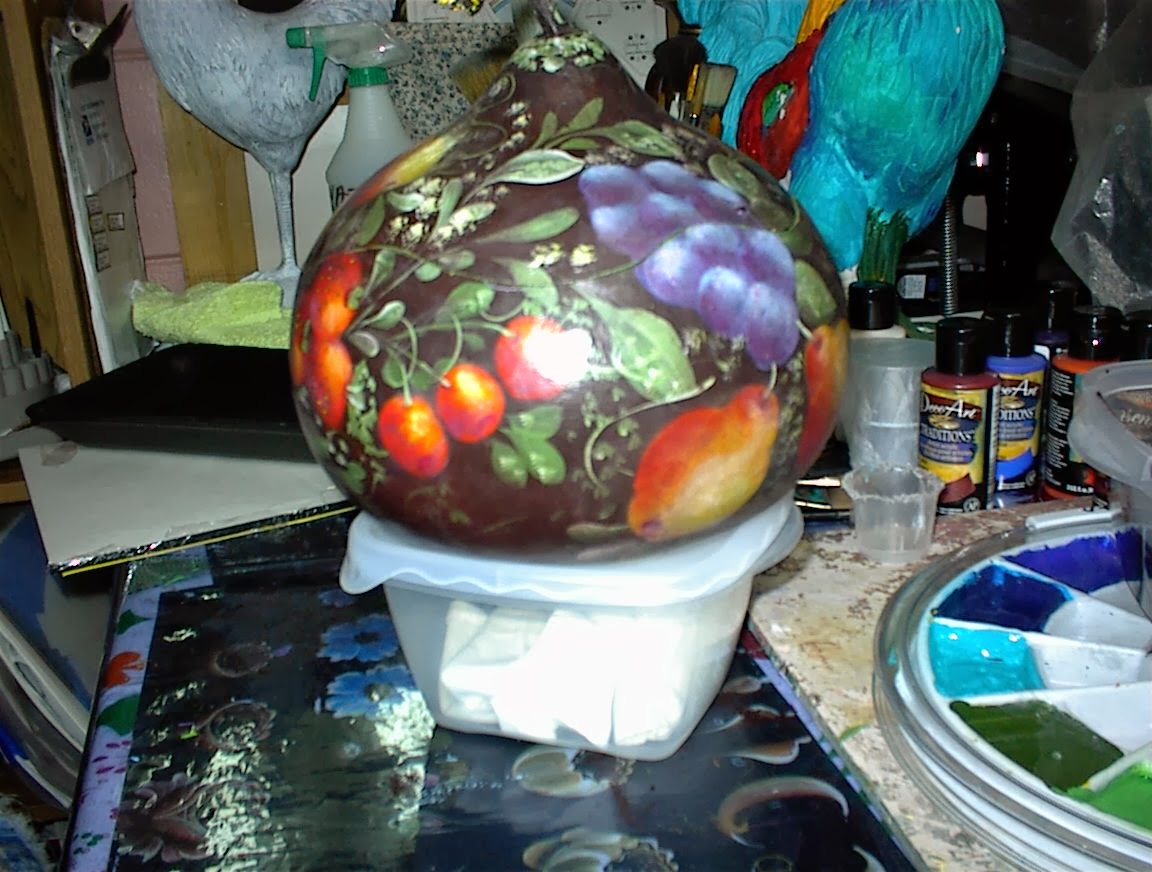

I will let that cure for a couple of days and maybe dry with the hair dryer and then give it a couple coats of varnish.
Sunday, September 29, 2013
Painting Gourd, Second Stage

Second stage:
I added some glazing medium to Sapphire Blue and a little water and pulled a
wash over the plums and grapes. When this was dry, I pulled some extender over
them and highlighted the plums and grapes with aquamarine+white and shaded with
Burgundy. The shading and highlighting is not side loaded but instead is patted
on and blended with the #6 filbert brush. I used my finger to pat here and
there and it’s amazing how well the paint behaves, just like oils.
The
Strawberries and cherries use the same technique. Highlight with Vermillion and
then Hansa Yellow Light and shade with Burgundy.


Subscribe to:
Posts (Atom)

 Posts
Posts


